Showing posts with label Tackle it Tuesdays. Show all posts
Tuesday, August 21, 2012
Tackle it Tuesday - Canning 101
A lot of people have asked me if I could teach them to can. I am able to do that and would love to do that. Canning is not difficult and most anyone can learn to do so by reading instructions in a book or online. In fact, I'll give some instructions here regarding the canning of the sweet and sour zucchini pickles, I did up today. Monday I canned Italian style crushed tomatoes and green beans. They both were canned in the pressure canner (the recommended process). Tonight I will can some more tomatoes and possibly more pickles (bread and butter this time?).
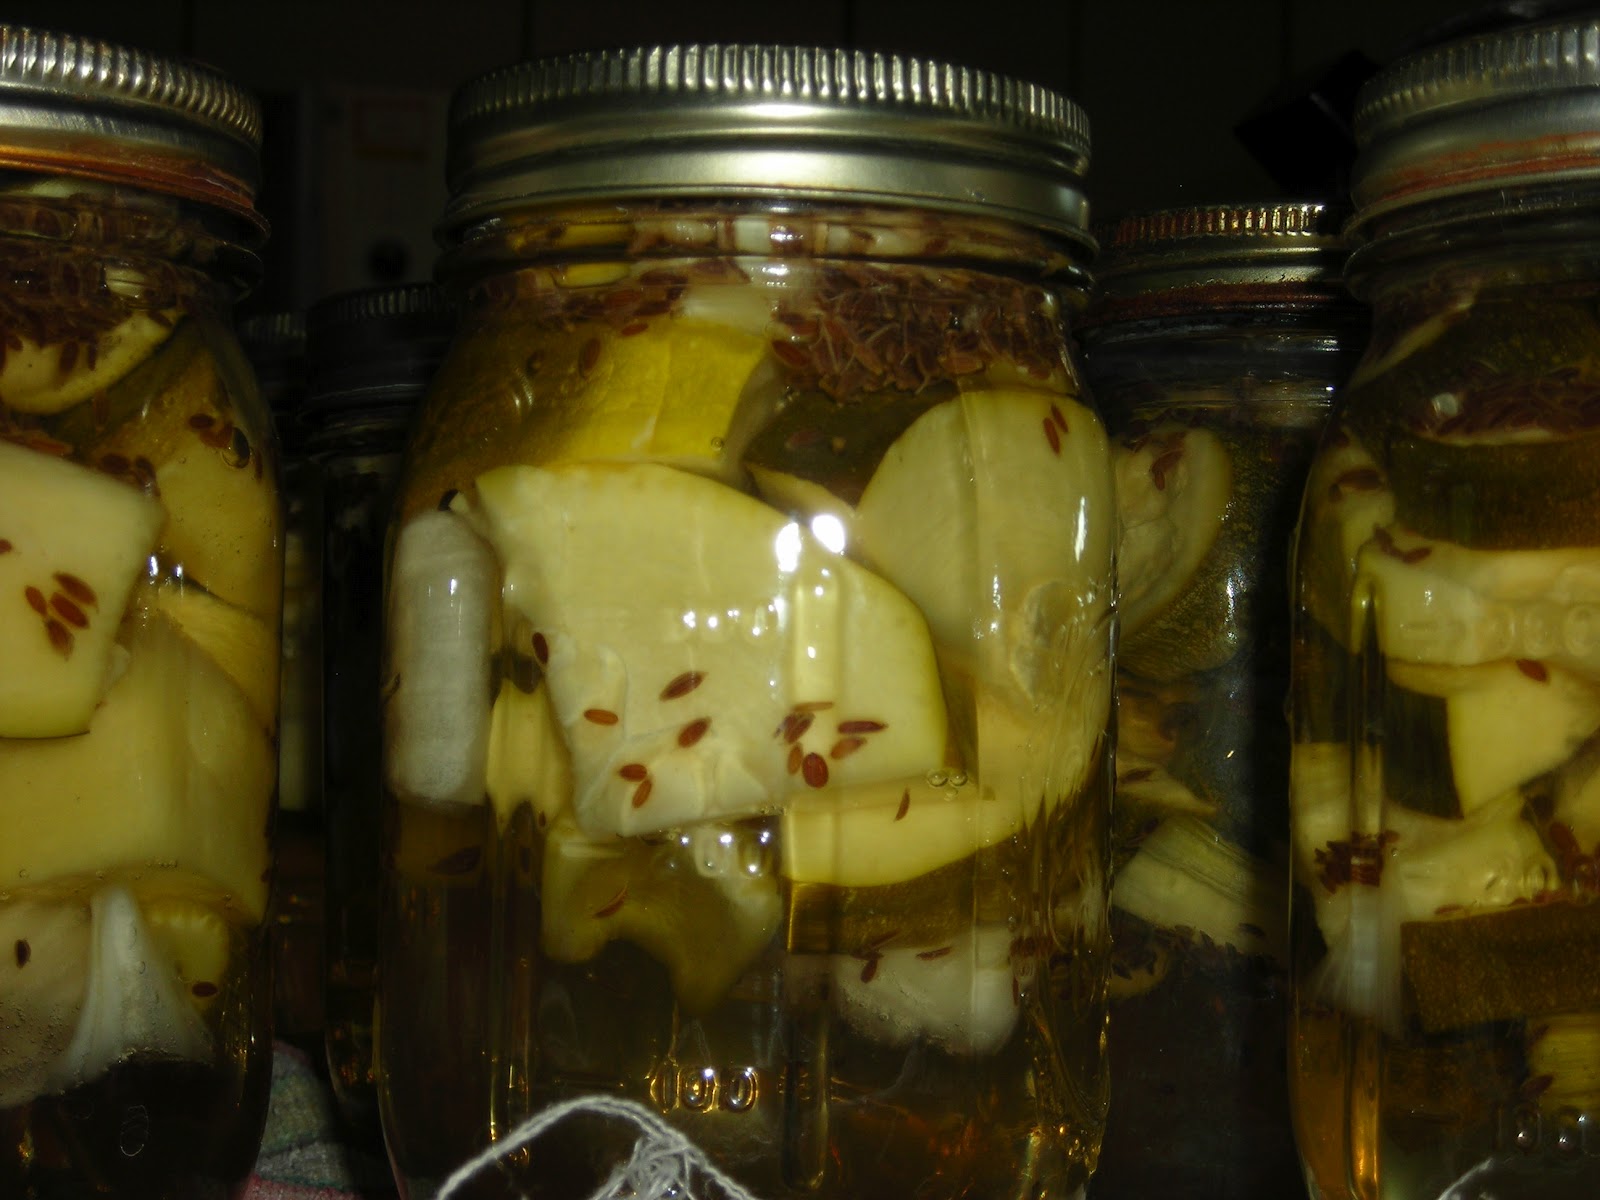
The pickles recipe goes like this:
Fill seven clean and sterilized (boil in water for a few minutes - be very careful) pint jars with chunked zucchini (you can go ahead and use some of that large, overgrown squash growing in your garden) with a few pieces of celery and a few small chunks of yellow onion. Spoon over that 1 teaspoon of dill seed (or 1 head fresh dill).
Make brine in a large pot: 4 cups sugar, 4 cups vinegar (can use white or cider), 2 cups water, 1/2 cup salt. Stir until sugar is dissolved and bring to a boil over high heat.
While brine is coming to a boil, get your lids and bands ready. Place lids in a small pan and cover with water. If you have a large mouth jar, be sure to use large mouth lids. If using regular, of course use regular lids. I have both in every batch for some stupid reason. Bring the water and lids to a boil. Turn off heat and leave lids in water for 10 minutes or so.
When brine is ready, take off heat and ladle over pickles, using a funnel to reduce making a mess on the rims and jars (and countertop). Fill to about 1/4 - 1/2 inch from top of jar. Then, taking a plastic knife or canning tool made for the job, remove air bubbles by plunging the knife around the pickles. Taking a clean, wet dish cloth, wipe the rims of the jars thoroughly. Place lid on top of jar and screw band, making sure the screw band is tight.
Place jars in a boiling water bath canner (filled about half-way with hot water and a splash of white vinegar and placed on the burner). Make sure the jars are completely covered with water. If they are not, add water with a pitcher or bowl to cover jars. Cover the canner and bring to a full, rolling boil. Set the timer for 15 minutes after the water comes to a boil. When the timer goes off, turn off heat. Carefully remove the lid. Wait for a few minutes and then remove jars to a towel on a close counter by using a jar lifter made for canning jars. Be careful not to knock the other jars or you might break a jar. Jars seal on their own - do not press the center of the lid down or place a fan on the jars in an attempt to hurry the process. If any jars are not sealed 24 hours later, place in fridge and use it a month later.
The next day, remove screw bands and test seal. Label the jars with the date. These pickles are not good until a month or 6 weeks later. Store in a dark, cool place for the winter, but they should not be frozen.
Wednesday, July 25, 2012
Tackle it Tuesday - Pickles and Ingredient Substitutions
I needed to can dill pickles but I didn't have any dill heads. Help! What happened was that my husband accidentally tilled up all of the dill I had growing in my garden. Could I substitute dill seed and/or dill weed? The answer is yes! According to the Ball Complete Book of Home Preserving, you can sub 1 to 2 tsp. dill seeds or 2 tsp. dried dill weed per head of fresh dill. Whew!
Tuesday, May 29, 2012
Tackle it Tuesday - Catching Up
If you're trying to juggle both career and homemaking, you are not alone. In fact, the Proverbs 31 Woman did it - and she did it well.
These days, I am working a part-time job at the library, working part-time from home as a freelance writer, and - yes - working full-time as a homemaker. To tell you the truth, I'm struggling a little to balance it all out, or to at least balance it so it works smoothly.
This week I've made a vow to quit procrastinating in the area of writing. In the past couple of years, I found that my life was getting busier and busier, so I put off the easily put-off: my freelance career. The result was not more time but was, instead, a frustrated wife and mother who felt that her own desired career was put on hold in order to make everyone else happy and comfortable. You know what a bad thing that was. It made for a crabby wife and mom - one who was letting the seed of resentment creep in. No more, however, as I have been making an hour's writing time a day a priority. Mind you, an hour is not much, but the hours do add up and they come together in a decent finished product. I have had two unfinished novels on hold, both of which I have begun to dig into a bit deeper with a committment to finish them and get them out the door and into the hands of a publisher.
Yesterday, I made a batch of soap and got it "incubating." Tomorrow I will cut it into bars and let it cure for a month. I didn't have any essential oils but I did have a bottle of fragrance/flavor oil in orange cream. I used that in this batch of castille soap and it turned the soap a beautiful yellow with a luscious smell. When one must improvise, she often finds that what she was doing turns out wonderfully.
My garden is, I believe, the victim of cutworm. They have destroyed one tomato plant and one bell pepper plant. Tonight after work I will be collaring my plants with stiff cardboard.
Another project I am working on, and have almost completed, is a book bag to place for sale on Etsy. It's coming out beautifully, in pink and gray. I work on it while I watch a little tv with the family. I really don't watch, but listen while I knit. I guess I sit in the family room in order to spend a bit of time with my husband and children.
Time is time and it is manageable. You just have to make a list of priorities and work on down that list as you can. Don't ever say that you "don't have time" because you really have all of the time there is. The real issue is: How will you manage your time? Hopefully you can answer, "I will manage my time in a way that honors God and my family."
Tuesday, August 23, 2011
Tackle it Tuesday - Planning for the Winter
Summer is nearly over and autumn will begin in the wink of an eye. Then....winter starts in with a cold, blasting fury. Okay, if you live in the south or some other warmer climate, you might not think of winter the way that we do up here in the north. Before September ends, we will have had our first hard freeze and, by the time October ends, it'll be snowing.
Ugh.
For our family, not only is winter cold and snowy, it's more lean - financially speaking. In order to make money stretch, I'm just now catching on that I have to really stockpile during the summer months. So, with that in mind, my tackle projects this week are to really begin to store up for winter.
First on the agenda was to make some dill pickles. The cucumbers in my own garden have been extremely slow to set on and mature, so I have found deals at our local farmer's market. A local farmer whom we know gave us enough cukes to make these 7 jars of dill pickles - for a grand total of $1.00. The dill was already growing fine in my garden, so that was free. These are easy to make and taste fantastic. The recipe? Just make a brine of 3 quarts distilled water, 1 quart cider vinegar, and 1cup pickling salt. Place pickles, 2 heads fresh dill and some peeled garlic cloves in the jars. Cover with boiling brine, seal, and process.
Soap is another product of which I want to have tons already made. I filled a large box of bars that I had curing. There are about 50 bars in the box. Might I add that it is stored in our bedroom (open box so the bars "air"), making it smell wonderful?
Amanda and I then made another batch of soap. I've been trying different fat combinations lately - mostly because I'm bored making the same old recipe every time. Today I made a batch with coconut oil, canola oil, and olive oil. Olive oil makes a harder bar than the other oils do, but since I blended in canola, it won't be like castille or anything. This batch turned yellow of its own accord. Usually we place a couple of crayons in the hot, melted fat for color. The scent is lemon grass with a little macadamia nut. Strangely, it smells like fresh squeezed lemon juice - very citrusy and nice. Day after tomorrow, I'll cut the bars and get them curing. With this batch, we'll have somewhere around 75 bars of soap stored for winter use. If you'd like to learn to make soap, I did a little tutorial here.
Last but not least, I've been buying washing soda and borax little by little and mixing it with Fels Naptha laundry bars. I normally make the powder detergent only because it's easier to store than liquids. We now have four one-gallon buckets made up and stored. Each bucket lasts us a month or better. I need to get ingredients for a few more buckets to round out the winter storage.
I plan to can tomatoes, peaches, pears, and applesauce yet too.
Visit Tackle it Tuesday at 5minutesformom.com.
Ugh.
For our family, not only is winter cold and snowy, it's more lean - financially speaking. In order to make money stretch, I'm just now catching on that I have to really stockpile during the summer months. So, with that in mind, my tackle projects this week are to really begin to store up for winter.
First on the agenda was to make some dill pickles. The cucumbers in my own garden have been extremely slow to set on and mature, so I have found deals at our local farmer's market. A local farmer whom we know gave us enough cukes to make these 7 jars of dill pickles - for a grand total of $1.00. The dill was already growing fine in my garden, so that was free. These are easy to make and taste fantastic. The recipe? Just make a brine of 3 quarts distilled water, 1 quart cider vinegar, and 1cup pickling salt. Place pickles, 2 heads fresh dill and some peeled garlic cloves in the jars. Cover with boiling brine, seal, and process.
Soap is another product of which I want to have tons already made. I filled a large box of bars that I had curing. There are about 50 bars in the box. Might I add that it is stored in our bedroom (open box so the bars "air"), making it smell wonderful?
Amanda and I then made another batch of soap. I've been trying different fat combinations lately - mostly because I'm bored making the same old recipe every time. Today I made a batch with coconut oil, canola oil, and olive oil. Olive oil makes a harder bar than the other oils do, but since I blended in canola, it won't be like castille or anything. This batch turned yellow of its own accord. Usually we place a couple of crayons in the hot, melted fat for color. The scent is lemon grass with a little macadamia nut. Strangely, it smells like fresh squeezed lemon juice - very citrusy and nice. Day after tomorrow, I'll cut the bars and get them curing. With this batch, we'll have somewhere around 75 bars of soap stored for winter use. If you'd like to learn to make soap, I did a little tutorial here.
Last but not least, I've been buying washing soda and borax little by little and mixing it with Fels Naptha laundry bars. I normally make the powder detergent only because it's easier to store than liquids. We now have four one-gallon buckets made up and stored. Each bucket lasts us a month or better. I need to get ingredients for a few more buckets to round out the winter storage.
I plan to can tomatoes, peaches, pears, and applesauce yet too.
Visit Tackle it Tuesday at 5minutesformom.com.
Tuesday, March 15, 2011
Tackle it Tuesday - Bible/Devotional Bag
I made something that I just adore - a knitted Bible/devotional bag. Mind you, I did NOT make this all in one day. It literally took two months of working on it little by little, usually an hour in the evenings.
I used to keep my Bible, prayer journal, and many spiritual books (the ones I'm currently reading) in a fabric shopping bag. This knitted one is nicer. I placed some pockets on the side and on front to hold pens, etc. Why do I keep all of that stuff in a bag? I do it because it is good to keep things neat, organized, and in one place.
I know I'm going to love this bag.
Tuesday, August 03, 2010
Tackle it Tuesday - Gluten-free Brown Bread
I spent Sunday night baking - our house gets too hot in the summer to use the oven too much during the day. I have searched high and low for a good gluten-free bread recipe and I think I've finally found one that I like. This is actually three recipes (one of them from my gluten filled cookbook) put together. The result is a gluten-free bread that is reminiscent of my grandma's brown bread. It has a good texture, tastes sweet (due to the molasses) and looks like normal bread. I want to share my recipe with you.
Gluten-Free Brown Bread
1 cup brown rice flour
1/2 cup white rice flour
3/4 cup sorghum flour
1/2 cup tapioca flour
1/4 cup potato starch
3 Tablespoons ground flax
1/2 cup skim dry milk powder
1/4 cup whole rolled oats (make sure gluten-free)
3 teaspoons xanthan gum
1/2 teaspoon salt
2 1/2 teaspoons active dry yeast
2 teaspoons white sugar
1 Tablespoon molasses
1 1/2 cup warm water (110 degrees or close), divided
2 eggs, beaten
1/4 cup margarine or butter, melted
1/4 cup brown sugar
Mix together yeast, 2 tsp. white sugar, molasses, and 1/4 cup warm water. Set this mixture aside to proof. It's ready when it's really bubbly and frothy. In a large mixing bowl, mix together all of the dry ingredients. In another bowl, mix together the remaining 1 1/4 cup warm water, eggs and margarine (or butter). Add the yeast mixture to this liquid mixture. Then add the liquid mix to the dry mix while beating on low speed. When mixed so it won't splatter, beat on medium speed using a flat paddle if you have one. Otherwise, use a regular beater in a pinch. Mix for 5-8 minutes. The dough will resemble a brownie or thick cake batter.
Pour dough into a greased loaf pan. Lightly oil a sheet of plastic wrap and put over the top of the dough and let the dough rise on the top of your stove while the oven warms to 350 degrees F. It should rise for 50 minutes or so. Place in warmed oven and bake 45 to 50 minutes. Crust will be brown and a thermometer placed in the loaf will read about 190 degrees.
Cool bread before cutting. Store in freezer after 2 days. Warm frozen bread in microwave for 10 seconds.
Tuesday, February 09, 2010
Tackle it Tuesday - Coupon Holder
I haven't done a Tackle it Tuesday post in some time and, after creating something particularly useful, I decided to post about it.
I have carried coupons in my purse, in a paper envelope, for some time only to find that the envelope kept tearing. It was a poor system. The other day I got so sick of it that I crocheted a coupon holder. Here's what I did:
I made a chain of 30 stitches (with Lion's Brand 100% Wool and size K hook) and then did four rows of single crochet. Then, I single crocheted around one side, then the long side, then the other short side, until I had done a round. I single crocheted around and around that bag, without turning, until it was an inch bigger than I wanted.
After I was done, I tied off the ends and knotted them well. I threw the completed bag in the washer, HOT water cycle, and HOT dryer cycle. I took it out of the dryer, stretched it on the sides, and sewed on a snap.
Lastly, I took a long piece of thin cardboard and folded it like a fan. My original thought was to glue fabric to the cardboard but, since it's not for a gift or anything fancy, decided to just go with the plain cardboard. Voila! I have a coupon holder that fits perfectly in my purse, is hand washable (don't put it in hot water again), and won't rip or tear.
Tuesday, December 01, 2009
Tackle it Tuesday - Mixed Bag
This week I found I've accomplished several "projects" that I've had on my to-do list::
- I completed the NaNoWriMo challenge (50,000 words of a novel in the month of November) on November 29 - one day shy of the deadline. Tickle me pink for that one! I still have another chapter or so to go before I can say I've completed my first draft, but I am so much further ahead by taking this literary challenge than I've ever been in the past.
- The other project I've been working on is a two tiered skirt for my daughter's Christmas present. I made the skirt (without a pattern -gasp!) in the time space of just about 1 1/2 hours. That's not bad for a person who hates to sew and does a terrible job doing it.
The first thing I did was measure Amanda around the waist. I cut two pieces of fabric double the size of her waist. I used solid yellow for the top part and a pink gingham for the bottom part. I made these two pieces the same length and checked to see that the skirt, once taken up for the elastic waistband and a hem at the bottom, would be the correct length. For my daughter, that is just below the knee.
I sewed the two pieces together, putting a couple of crocheted butterfly pieces on the front. Then I sewed a 1/4 inch hem around the bottom. I folded over the waist big enough for the waistband, leaving an opening to thread the elastic (cut to the size of Amanda's waist). After threading the elastic in (using a safety pin at the end to move the elastic through), I sewed the two ends of elastic together, going back and forth several times to make sure it didn't come apart. Then I closed up the opening.
Then I ironed the seams flat and ironed the piece over.
Voila! A good old fashioned skirt.
Tuesday, September 15, 2009
Tackle it Tuesday - Applesauce
I've been really busy these past couple of days and this (below) is why.Last Friday afternoon, our family went out to the state forest (next door) and picked apples. At Inspiration Point is a very old orchard, left over from the time it was private property and farmers tried to do something with the sandy, swampy property. Yes, sand and swamp together! You gotta love Michigan.....
Anyway, we picked several bushels of apples - mainly yellow delicious and McIntosh. I decided to can most of the sauce because I am limited on freezer space. We're divided - husband likes it frozen, children like it canned, and I can go either way. Canning isn't too bad because it takes only 20 minutes in the boiling water bath.
I have a Roma Saucer that squeezes out the cooked apples ever so nicely. The boys did the squeezing and I did the cutting and cooking. Then I canned the sauce, freezing whatever didn't fit into quart jars. I think I have one or two days left to finish the entire batch we picked. I can't believe how tired I am!
So far I've done 22 quarts.
Tuesday, August 25, 2009
Tackle it Tuesday - Peaches & Apricots
I'm so tired right now I'm not even going to try to write up a lengthy post about this. Last night my husband came home from work with 1/2 bushel of apricots and 1/2 bushel of peaches. It was all very ripe and needed to be taken care of ASAP.I spent from 8:30 this morning until 3:00 this afternoon working on the fruit. I canned 21 quarts using a medium syrup (2 cups water to 1 cup sugar). There were still quite a bit of apricots left over so I placed them in the dehydrator. They need to be pretreated so I dipped the cut ends in lemon juice mixed with about half a cup of left over syrup. This way they won't turn brown.


Last but not least is the pot of coffee beginning to brew in the picture below. No explanation is needed for that one.

Visit Tackle-it-Tuesday each week to see what others around the blogosphere are doing.
Tuesday, July 28, 2009
Tackle it Tuesday - My Son's Caterpillars
This is a different sort of Tackle it Tuesday project, I know. For some of my fellow homeschool moms, this will be interesting. For those of you interested in science or nature, this will interest you. For others, this will be ridiculous.My son, Jonathon (the one going to Mombasa tomorrow), cares for moths and caterpillars. He's an avid insect collector and has some really wonderful collections that he takes to garden clubs, nursing homes, etc. He speaks about biology and ecology to these groups and they keep asking him to come back.
Below is a picture of some baby Hickory Horn Devils for which he needed to make some new larvae sleeves. We think a bear has been trying to get this particular batch because the old sleeves were ripped from the trees. By the way, when raising caterpillars you must make sure that you give them their own particular food supply. Too many people take a couple of caterpillars they find somewhere and place them in a jar with a few leaves they randomly plucked from a tree. Each species eats only certain foods and they will starve to death if not given what they require. These caterpillars eat walnut and hickory leaves - surprise!
Jonathon buys tulle material from the fabric department at the store. Yes, it's the same material you might use for a wedding dress or prom dress.
I helped him cut about 3 1/2 feet lengths of the stuff.
Fold it across lengthwise and sew or staple the long end and one of the short ends so that it is closed tight around those ends and nothing can slip out (or in!) Jonathon staples because he refuses to sew.
Place the caterpillars inside the sleeve and place over a branch of the tree that is the caterpillars' food source - a walnut tree here. Then, tie the open end shut with string.
The caterpillars then can feed in safety from birds and other animals that would prey upon them. (like bears!) Once in a while you should move the sleeve to other branches. This does not kill the tree or harm it. These Hickory Horn Devils will feed and grow and eventually pupate to become moths.I can't say this was a particularly fun project for me, but I have learned a lot about some of God's tiniest creatures through these sorts of things. Isn't it amazing what your kids will teach you?
By the way, Jonathon brought home a few caterpillars that were about to pupate and placed them in a box with some walnut leaves. Last night one tried to escape. They pupate in the ground, not in a cocoon on a branch as some other moths do. This caterpillar wandered into our hallway looking for a place in which he could burrow and form a pupa. I walked to the bathroom and stepped on it. YUCK!
Find other Tackle it Tuesday projects at 5 Minutes for Mom.
Tuesday, July 21, 2009
Tackle it Tuesday - Garden Produce

Yesterday I tackled my garden - somewhat. I harvested peas, zucchini, and cabbage. Today I will work a bit on weeding yet again. I thought I might share with you a bit about preparing your harvest for winter storage. For most of my readers, this is elementary. For others, though, it might prove interesting.
I picked peas - just about a gallon once they were shelled. This variety is Little Marvel, which grows well here in the north. They are not tall plants, so they need minimal staking.
These are not washed yet....
I freeze peas rather than can them. My mother canned them quite often. She never used a pressure cooker but that is the safest way to can low acid foods such as peas.
To prepare for freezing, you must blanch peas for 2 minutes. This means that after a pot of water reaches the boiling point, add the peas and bring back to a boil. Boil for 2 minutes then immediately drain and cool the peas in cold water.
Drain them and shake as much excess water off as you can (just shake the colander a bit). Pack the peas in freezer bags and place in the freezer. I love my vacuum sealer for freezing but don't have the bags yet. I did mine in Ziplock bags. Make sure you squeeze out as much air as you can before sealing.
To do this, cut the tops off the beets to about an inch of stem left on. Trim off the roots. Boil for about 10 minutes - just until a fork about goes in but the beet is cooked all the way through. Cool quickly and drain. Peel the skin off the beets and take off the stems. Put in freezer bags and freeze.
Find other Tackle it Tuesday posts at: 5 Minutes for Mom.
Tuesday, June 30, 2009
Tackle it Tuesday - Make Your Own Invitations
Our son #2, Jonathon, graduated from our homeschool this year. We haven't had an open house yet and finally realized that we'd best get to it, especially since this boy will be leaving in less than a month for a missions trip to Mombasa, Kenya. Time is wasting.When we got to checking the stores for ready-made graduation announcements, we found that we were a bit too late in purchasing them. That's a good thing! This way I can be a tiny bit creative and SAVE some money.
Last night I worked with Microsoft Publisher and printed these:
The entire batch of invitations will have cost me about $15 (for two parties), not counting postage. I think we can safely hand some invitations in person to save stamps.
In the next couple of days I will print up more invitations for another open house to be held with family and friends in Indiana. That party will have to be done after Mombasa and after we get our van in traveling order.
Tackle it Tuesday is hosted by 5 Minutes for Mom.
Tuesday, June 23, 2009
Tackle it Tuesday - Library Book Bags
Today I did a tackle it project with my two youngest children. Okay, some of you are thinking this craft is not a big tackle, but for this mom who hates to do arts and crafts, it really IS!We made a library book bag by taking a plain cloth tote bag (easily and cheaply purchased at any store that carries arts & crafts supplies - Wal-Mart, K-Mart, some dollar stores, Ben Franklin, etc.). Then we used stencils and permanent colored markers (Bic, shaped like Sharpies) to create colorful designs. It worked beautifully, as you can see from the pictures below.
If you do this, be sure to put a piece of cardboard inside the bag as you color. It prevents bleeding through on the fabric.
It only takes a moment to dry and VOILA! You have a beautiful book bag to carry all of those wonderful books you chose from the library back and forth.
This is Amanda's bag, both sides:
Tuesday, June 02, 2009
Tackle it Tuesday - Scrapbooks
I know I'm a little late tonight putting this up, but I just finished a two-year project and I'm so relieved that I wanted to share it with you.I began a tradition two years ago when I put together a scrapbook for my oldest son's graduation present. I decided that I wanted to do this for each of my five children. This year, Jonathon graduated from high school and I just finished his scrapbook today. Below is a page out of the book. Sorry about the glare from the lights.
If you're really into homemaking ideas and helps, visit Tackle it Tuesdays and you'll see a whole plethora of projects listed.
Subscribe to:
Posts (Atom)